Image Generation Workflow: From Prompt to Production
This guide provides a comprehensive, step-by-step framework for turning creative ideas into production-ready images using AI. We demystify the complete workflow across five key stages: Definition & Planning, Prompt & Generation, Refinement & Editing, Optimization & Preparation, and finally, Integration & Publication. You'll learn not just how to write effective prompts for tools like Midjourney, DALL-E, and Stable Diffusion, but also how to refine raw outputs, upscale quality, ensure ethical and legal compliance, and integrate final assets into real-world projects like blogs, marketing materials, and social media. Designed for beginners and non-technical creators, this article bridges the gap between initial experimentation and professional, reliable use of generative AI for visual content.
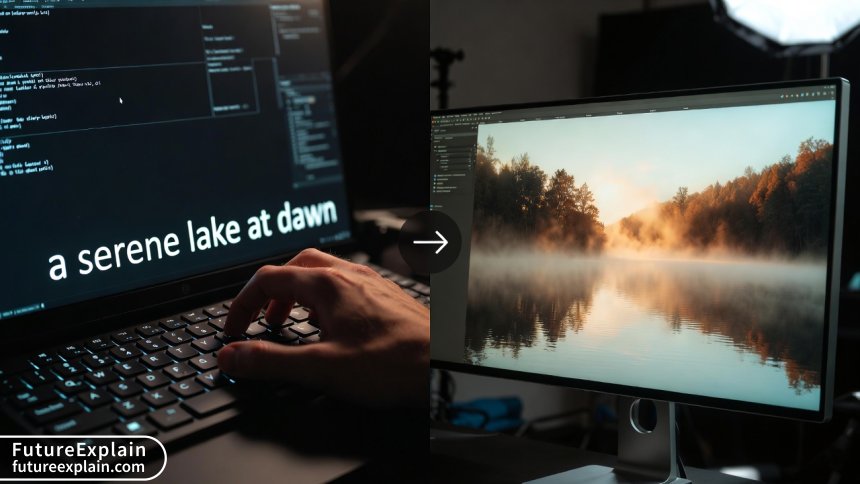
Image Generation Workflow: From Prompt to Production
Generative AI has opened a world of visual possibility, allowing anyone to create images from simple text descriptions. But moving from a fascinating first experiment to reliably producing high-quality, usable images for a blog, business, or project requires more than just a clever prompt. It requires a workflow—a repeatable, structured process that turns a creative spark into a polished, production-ready asset.
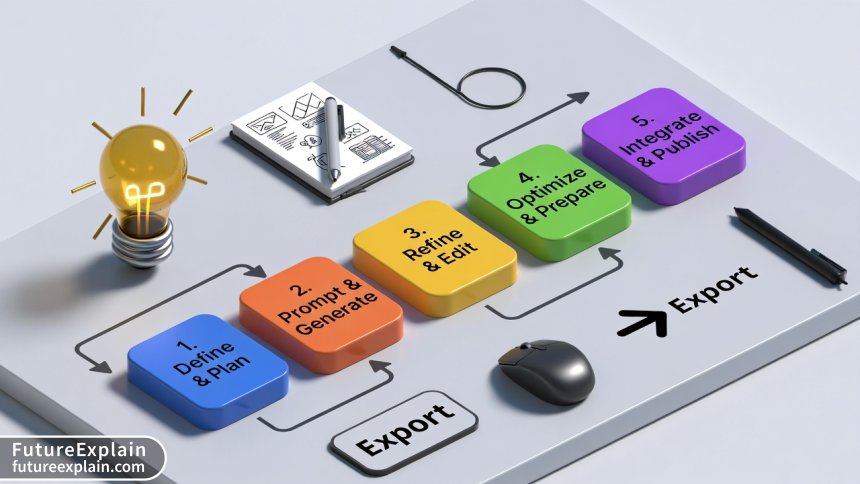
This guide breaks down that complete journey into five manageable stages. Whether you're a blogger in need of unique featured images, a small business owner creating marketing materials, or simply a curious beginner, this workflow will help you navigate from your initial idea to a final image you can confidently use.
Stage 1: Define and Plan – Laying the Foundation
Before you type a single word into an AI tool, the most crucial step is planning. Skipping this is like building a house without a blueprint; you might get a structure, but it likely won't fit your needs. This stage is about moving from a vague idea to a clear creative brief.
Clarify Your Purpose and Audience
Ask yourself: What is this image for? The purpose dramatically shapes every decision that follows.
- Blog Header Image: Needs to be wide-format (e.g., 1200x628px), visually striking, and relevant to the article's topic to encourage clicks and shares.
- Social Media Post: Might need to be square (1:1) or vertical (9:16) for stories, with bold colors and clear focal points that work at small sizes.
- Product Concept Mock-up: Requires specific dimensions, a consistent style, and attention to realistic details like materials and lighting.
- Book Cover Illustration: Demands a strong narrative quality, genre-appropriate style, and room for title text.
Similarly, consider your audience. An image for a professional B2B report requires a different tone (clean, trustworthy, data-informed) than one for a children's education app (bright, playful, friendly).
Define Core Visual Requirements
With your purpose in mind, define the non-negotiable elements. This is your checklist:
- Subject: What is the main focal point? (e.g., "a robot," "a cozy cafe," "a futuristic city").
- Style: What is the artistic medium? (e.g., "photorealistic," "watercolor painting," "3D render," "vector illustration," "cyberpunk digital art").
- Composition: What's the framing? (e.g., "close-up portrait," "wide-angle landscape," "overhead shot").
- Mood & Lighting: What feeling should it evoke? (e.g., "warm and nostalgic with sunset lighting," "cold and mysterious with neon lighting").
- Key Details: Are there specific objects, colors, or actions that must be included? (e.g., "a person holding a tablet," "blue and silver color scheme," "rainy street").
Document this brief. A simple note-taking app is perfect. This brief becomes your north star, keeping you focused and allowing you to systematically evaluate the AI's outputs.
Understand the Tool Landscape
Different AI image generators have different strengths. Your brief can help you choose the right starting tool. For a foundational understanding of how these tools create images, you can explore our guide on Understanding Diffusion Models.
- Midjourney: Excells at artistic, painterly, and highly stylistic images with a strong creative "feel." It's less predictable for photorealism but brilliant for concept art and evocative scenes.
- DALL-E 3 (via ChatGPT or Microsoft Copilot): Excellent at accurately interpreting complex, detailed prompts and rendering text within images. It tends to produce a cleaner, more illustrative style.
- Stable Diffusion (via platforms like DreamStudio, or locally with Automatic1111): Offers immense control and customization through a vast library of community-created models (checkpoints), Loras (style/character adapters), and detailed settings. It has a steeper learning curve but is powerful for specific, repeatable styles.
- Adobe Firefly: Integrated into Creative Cloud, it's designed to be safe for commercial use (trained on Adobe Stock and public domain content) and works seamlessly with Photoshop's Generative Fill for editing.
For beginners, starting with DALL-E 3 or Midjourney via their chat interfaces is often easiest. As your needs become more specific, exploring Stable Diffusion's ecosystem can be a logical next step.
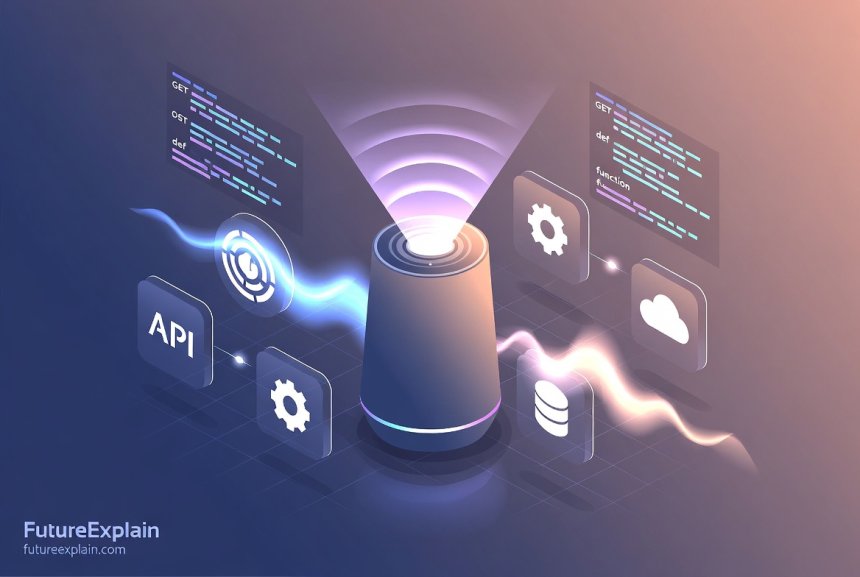
Visuals Produced by AI
Stage 2: Prompt and Generate – The Art of Communication
This is where you translate your creative brief into a language the AI understands. A prompt is not a magical incantation, but a set of instructions. The key is to be clear, specific, and structured.
Crafting Effective Prompts: Beyond a Single Sentence
A strong prompt often follows a template. Think of it as building a sentence with different types of clauses:
[Subject] + [Action/Context] + [Detailed Description] + [Artistic Style] + [Technical Specifications]
Let's see how this works by evolving a weak prompt into a strong one.
- Weak Prompt: "A dog." (Too vague. The AI has infinite possibilities.)
- Better: "A golden retriever puppy playing in a sunlit autumn park." (Adds subject details and context.)
- Strong Prompt: "A photorealistic portrait of a joyful golden retriever puppy, playing with a red frisbee in a park covered with orange and yellow autumn leaves. Sunlight filters through the trees, creating dappled bokeh highlights in the background. Shallow depth of field, sharp focus on the puppy's eyes, shot on a professional 85mm lens."
The strong prompt provides the AI with concrete visual information: the breed, action, setting, season, lighting effect, camera technique, and focal point.
Iterate and Explore Variations
Your first generation is a starting point, not the finish line. All major tools allow you to create variations.
- Use Variation Buttons/Commands: In Midjourney, use
V1,V2, etc., on an image you like to generate new versions with similar composition and style. In DALL-E, click "Variations." - Refine Your Prompt: Identify what you like and don't like. If the style is right but the subject is wrong, keep the style keywords and change the subject. If the colors are off, add color direction: "use a vibrant, saturated color palette."
- Batch Generate: Most tools let you generate 2-4 images at once. Use this to get a range of interpretations quickly. Save all promising outputs, even if they're imperfect—they can be edited later.
Advanced Techniques: Negative Prompts and Parameters
As you progress, you can gain more control by specifying what you don't want and adjusting engine settings.
- Negative Prompts: Especially powerful in Stable Diffusion, these tell the AI what to avoid. For example, adding "ugly, deformed hands, blurry, watermark, text, cartoon" to your prompt can significantly improve image quality by steering the model away from common failure points.
- Parameters: Tools like Midjourney and Stable Diffusion use parameters to control aspects like aspect ratio (
--ar 16:9), how much it should follow your prompt (--stylizein Midjourney,CFG Scalein Stable Diffusion), and which specific model version to use.
The core principle here is conversational iteration. You are having a dialogue with the AI, guiding it closer to your vision with each round of feedback. This process mirrors the foundational machine learning principle of learning from data, which you can read about in our article How Does Machine Learning Work? Explained Simply.
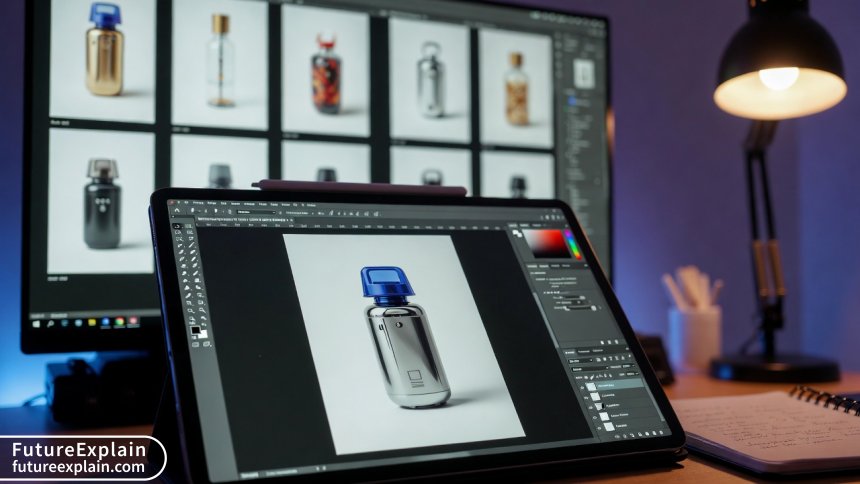
Stage 3: Refine and Edit – The Human Touch
Rarely is a raw AI generation perfect for final use. This stage is where human creativity and traditional editing skills elevate the good to the great. It's also where you address the common limitations of generative AI, such as odd anatomy, garbled text, or inconsistent details.
Selecting the Best Raw Output
Review your generated batch against your original creative brief. Which image best fulfills the purpose, style, and mood? Look for the strongest composition, the most coherent details, and the fewest obvious flaws. Don't just pick the prettiest one; pick the most usable one.
Mastering Inpainting and Outpainting
These are two of the most powerful techniques for fixing problems and expanding creativity.
- Inpainting: This allows you to select a problematic part of an image (a distorted hand, a strange object in the background) and have the AI regenerate just that area based on a new prompt. In Photoshop (Generative Fill), DALL-E's editing interface, or Stable Diffusion's inpainting mask, you can say, "a natural human hand holding a cup," and the AI will seamlessly blend a correction into the existing image.
- Outpainting: This lets you expand the canvas, asking the AI to imagine what lies beyond the image borders. It's perfect for turning a portrait into a landscape or extending a background to fit a different aspect ratio.
Using Traditional Editing Software
AI generations are just another type of digital asset. Import them into the software you already know.
- Adobe Photoshop / Affinity Photo / GIMP: Use these for final color correction, brightness/contrast adjustments, compositing multiple AI elements together, cloning away minor artifacts, and adding any necessary non-AI elements (like clean logos or text overlays).
- Layer AI and Traditional Tools: A common workflow is to generate a background with AI, cut out a subject from another AI image, composite them in Photoshop, and then use traditional brushes to paint in shadows, highlights, or details that unify the scene.
This editing stage addresses a key concern in the AI world: the lack of true understanding. As noted in research, AI systems process patterns but lack real cognitive intelligence or a moral compass[citation:9]. The human editor provides the critical reasoning, ethical consideration, and final quality control. For more on the relationship between human and machine creativity, see our discussion AI vs Human Creativity: Can AI Replace Creativity?.
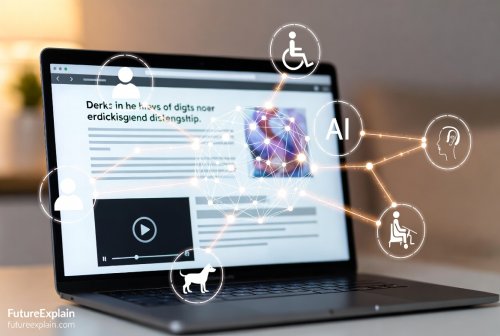
Visuals Produced by AI
Stage 4: Optimize and Prepare – Getting Ready for the Real World
Your image looks great on your screen. Now, you need to ensure it performs well in its intended environment, whether that's a fast-loading webpage, a high-resolution print brochure, or a social media platform with strict rules.
Upscaling for Quality
AI generators often produce images at a base resolution (e.g., 1024x1024px). For print or large digital displays, you need to upscale.
- Built-in AI Upscalers: Midjourney's
--upscalecommands, DALL-E's "HD" option, and Stable Diffusion's dedicated upscaling models (like ESRGAN) use AI to add plausible detail while increasing size, often by 2x or 4x. - Dedicated Tools: Standalone applications like Topaz Gigapixel AI or online services specialize in intelligent upscaling, often with more control over the process than built-in tools.
- Important Note: Upscaling cannot create true detail that wasn't there. It interpolates and guesses. The best results come from upscaling a already high-quality, sharp base image.
Format and Compression
Choosing the right file format is crucial for balancing quality and file size.
- JPEG (.jpg): The universal standard for photographs and complex images on the web. Use a high quality setting (80-90%) to minimize compression artifacts.
- PNG (.png): Best for images with sharp edges, text, or transparency (like logos). It uses lossless compression but results in larger files than JPEG.
- WebP (.webp): A modern format that provides superior compression (smaller files) than JPEG or PNG at similar quality. It's increasingly supported by browsers and CMS platforms like WordPress.
Always run your final image through a compression tool (like TinyPNG, ShortPixel, or your CMS's built-in optimizer) to reduce file size for faster website loading without visible quality loss.
Legal, Ethical, and Attribution Checks
This is a non-negotiable step before any commercial or public use.
- Review Platform Terms: What does the AI tool's license allow? Most, like DALL-E 3 and Midjourney, grant you commercial rights to the images you create, but some have restrictions (e.g., you cannot trademark the image itself). Adobe Firefly is designed for commercial safety. Always check the current terms of service for your specific tool.
- Ethical Sourcing: Be aware of the debate. AI models are trained on vast datasets of existing images, which raises questions about copyright and fair compensation for original artists[citation:1]. While the legal landscape is evolving, being informed is part of responsible use. For a deeper dive, consider our article on the Ethics of AI-Generated Media.
- Disclosure (When Necessary): Some publications, clients, or contest rules may require you to disclose the use of AI-generated imagery. Transparency builds trust with your audience.
- Final Reality Check: Does the final image accurately and appropriately represent its subject? Could it mislead or cause harm? This final human judgment is essential.
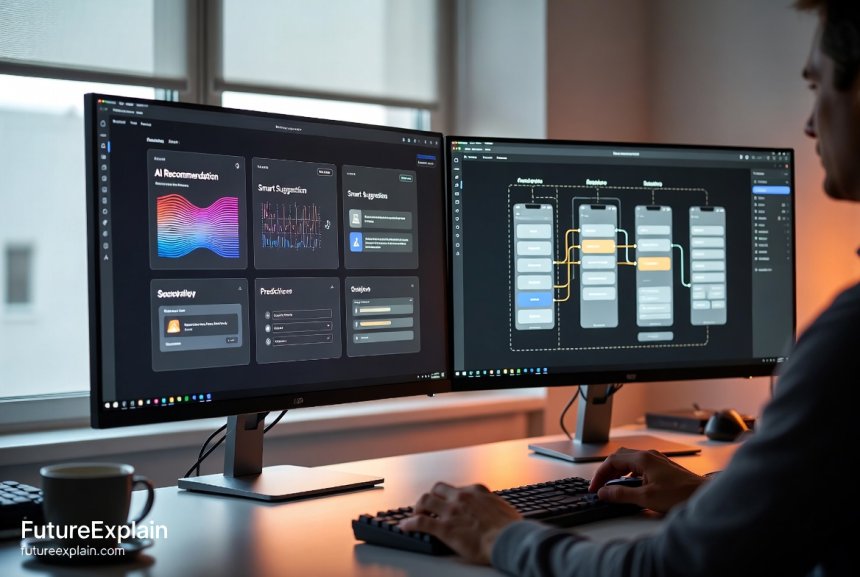
Stage 5: Integrate and Publish – Launching Your Work
The final stage is about deploying your asset effectively and learning from the results.
Integration into Your Project
Follow the technical specifications of your platform.
- Web/CMS (WordPress, Webflow, etc.): Upload the optimized file. Use descriptive, keyword-rich file names (e.g.,
ai-image-generation-workflow-guide-diagram.jpg) and fill in the Alt Text field thoroughly. Alt text is critical for accessibility (screen readers describe the image to visually impaired users) and provides contextual information to search engines. - Social Media: Use platform-specific ideal dimensions. Consider creating slight variations (e.g., a square crop for Instagram Feed, a vertical crop for Stories/Reels) from your master image to maximize impact on each channel.
- Print/Document: Ensure the image resolution is at least 300 DPI (dots per inch) at the final print size. Convert color profiles to CMYK if required by your print service.
Performance and Iteration
The workflow doesn't end at publication. Observe how your image performs.
- Analytics: For website images, did the page have a low bounce rate or high engagement? For social media, did the post get more likes, shares, or clicks?
- A/B Testing: If you're generating images for ads or key landing pages, try creating two different visual styles (A and B) and see which one drives better results.
- Feedback Loop: Document what worked and what didn't. Did a certain prompt style lead to more usable outputs? Did a particular editing fix save you time? Add these insights to your creative brief template for the next project.
By closing the loop with analysis, you turn a one-off creation process into a continuously improving system, maximizing the return on your creative investment. This systematic approach to content creation is becoming a key differentiator, as organizations find that blending AI efficiency with human strategic direction yields the best results[citation:5].
Conclusion: Your Path to Confident Creation
Mastering the AI image generation workflow transforms it from a novel toy into a reliable professional tool. It demystifies the process, replacing randomness with repeatable strategy. Remember:
- Plan with Purpose: Always start with a clear creative brief.
- Prompt with Precision: Structure your instructions and embrace iterative refinement.
- Refine with Skill: Use AI editing features and traditional software to fix flaws and enhance quality.
- Prepare with Care: Optimize for technical performance and verify legal/ethical standing.
- Integrate with Insight: Deploy correctly and learn from the results.
By following these stages, you take full ownership of the creative process. The AI becomes a powerful collaborator in your workflow, not a black-box oracle. Start simple, be patient with the learning curve, and enjoy the journey of bringing your unique visual ideas to life.
Further Reading
To deepen your knowledge, explore these related guides on FutureExplain:
- Top Image-Generation Tools in 2024: A Practical Guide – A detailed review of the tools mentioned in this workflow.
- Prompt Engineering Best Practices for Better Outputs – Dive deeper into the art and science of crafting effective prompts.
- AI for Accessibility: Making Content Inclusive – Learn how to ensure your AI-generated content, including images, is accessible to all.
Share
What's Your Reaction?
 Like
16540
Like
16540
 Dislike
85
Dislike
85
 Love
1120
Love
1120
 Funny
310
Funny
310
 Angry
25
Angry
25
 Sad
15
Sad
15
 Wow
655
Wow
655


Thank you for this clear, calm, and educational guide. No hype, just useful information. This is the kind of content that builds long-term trust.
The performance and iteration stage is gold. I run a niche website, and after A/B testing two different AI-generated header image styles, I saw a 15% increase in time-on-page for one of them. Data-driven design starts here.
As a teacher, I'm planning to use this article as a framework for a module on digital creativity for my students. It breaks down a complex topic into logical, manageable steps. Perfect for beginners.
The ethical reminder is crucial. It's easy to get carried away with the power. Using tools like Firefly for commercial work because of its more transparent training data is a responsible choice I've started making after reading this.
I'd love to see a follow-up with real-world case studies. Maybe a walkthrough of creating a complete set of images for a blog post or product page, using this exact workflow.
The link to the article on diffusion models was super helpful for understanding the 'how' behind the tools. It made the advice about iteration and negative prompts make more sense. Thanks for the interconnected content!