How to Edit and Enhance Images with AI (Beginner’s Walkthrough)
Beginner-friendly guide on using AI to edit and enhance photos. Learn how to automatically improve color, remove backgrounds, upscale resolution, and more with AI image editing tools.
Summary
This article is a beginner’s walkthrough on using AI-powered tools to edit and enhance images. It covers common AI editing tasks like automatic color correction, object removal, upscaling resolution, and colorizing black-and-white photos. The guide explains each feature in simple language and provides step-by-step instructions for using them. It is written for non-technical readers who want to improve their photos using AI tools. By reading this, beginners will learn how to choose an AI editing tool, apply enhancements, and save their images. The article solves the problem of understanding how to start editing photos with AI, making the process clear and accessible to people new to AI or digital photography.
Understanding AI Image Editing
AI image editing refers to using machine learning models and algorithms to alter, enhance, or transform images in ways that were traditionally done by hand or through specialized software. It covers tasks like automatically adjusting brightness and color, removing objects or backgrounds, upscaling resolution, and even colorizing black-and-white photos. For beginners, AI-powered tools can make complex editing tasks easy with just a few clicks or simple commands. This article explains common AI editing features and walks you through how to use them. By the end, you’ll feel more confident about starting your own AI image editing journey. The content here is beginner-friendly, focusing on practical steps and examples. If you are new to AI or photo editing, you’ll find straightforward explanations here to solve the problem of making images look better using modern AI technology.
Common AI Image Enhancement Features
Modern AI image editing tools often include features that were hard to perform manually in the past. Here are some common tasks:
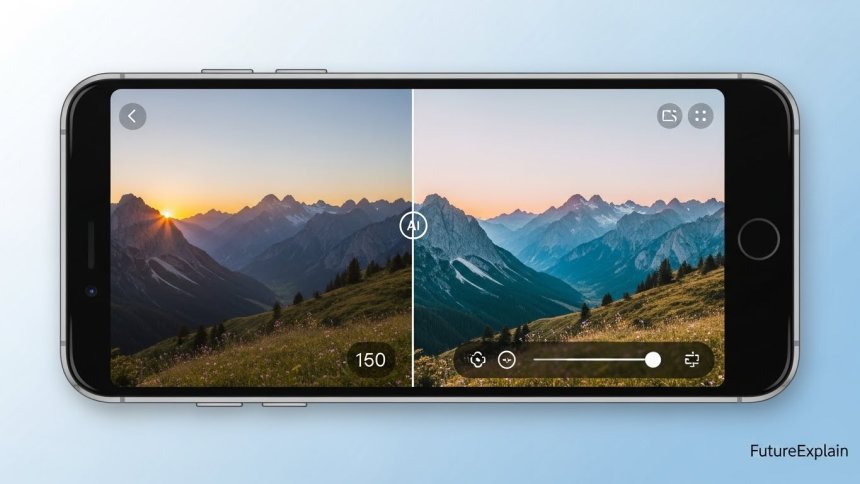
- Automatic Color and Lighting Adjustment: AI can quickly analyze an image and automatically correct exposure, brightness, contrast, and color balance. This saves time compared to manual tweaking.
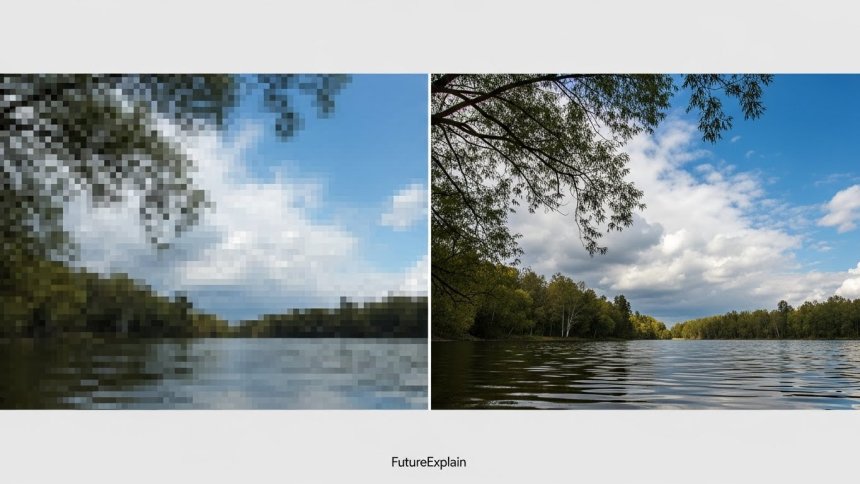
- Super Resolution (Upscaling): AI algorithms can intelligently increase the size of an image (like making a small photo bigger) while preserving details and reducing blur. This is great for improving low-resolution pictures.
- Object Removal and Background Editing: AI can detect and remove unwanted objects or people from a photo, and even fill in the missing background automatically (also called inpainting). For example, you can remove a photo bomb or smooth out blemishes easily.
- Colorization of Old Photos: Turn old black-and-white photos into color. AI can estimate realistic colors and apply them to grayscale images.
- Noise Reduction and Sharpening: AI can remove digital noise from photos (especially in low-light shots) and sharpen blurry areas to make images clearer.
- Style Transfer: Some tools allow you to apply a creative filter or artistic style (like turning your photo into a painting) using AI.
Step-by-Step: How to Edit an Image with AI
Let’s walk through an example of editing an image using AI. The exact interface will vary by tool, but the basic steps are similar:
- Choose an AI Image Editing Tool: Start by selecting a beginner-friendly AI tool. There are many free or easy-to-use options online and in apps. (You can explore more options in the AI Image & Design Tools category.)
- Upload or Open Your Image: Once you pick a tool, upload the photo you want to improve. Look for an “Upload” or “Open” button in the interface.
- Select an Enhancement Feature: Most tools have buttons or menus for different AI features (like “Enhance,” “Upscale,” “Remove Background,” etc). Choose the feature you want to try first. For example, click “Enhance” to auto-correct color and lighting.
- Adjust Settings (Optional): Some tools let you fine-tune the AI effect (e.g., how strong the filter is). Beginners can often skip this or use default settings. For more advanced learning, refer to articles like how machine learning works.
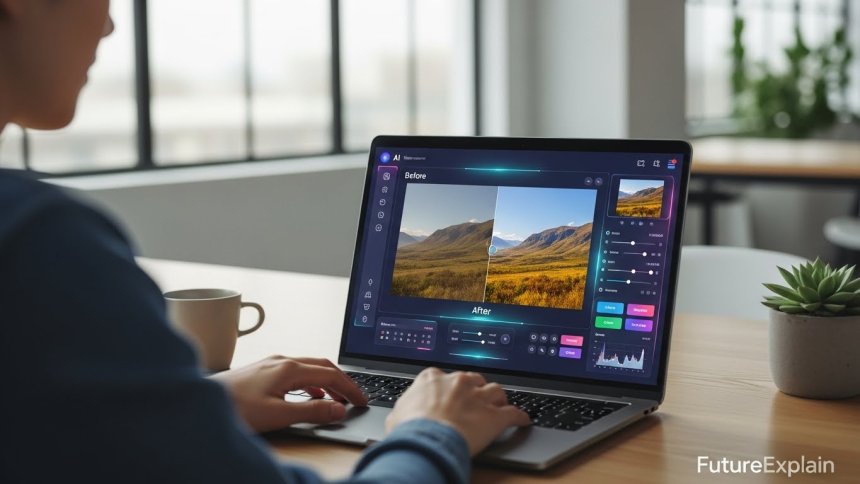
- Apply and Compare: Click to apply the AI effect. The tool will process the image (sometimes it takes a few seconds). Compare the result with the original. Many tools let you preview before and after.
- Save the Edited Image: If you’re happy with the result, save the image. There should be a “Download” or “Save” button. Choose a file format (usually PNG or JPEG) and store it on your device.
By following these steps, you can perform many common edits with just a few clicks. For example, to remove a background, select the “Remove Background” option instead of “Enhance,” and let the AI separate the main subject from the background. The key is to experiment with different features. Over time you’ll see how each tool improves photos and which ones work best for you.
Popular Tools for AI Image Editing
There are many AI image editing tools aimed at beginners. Here are a few types:
- Online Editors: Websites like remove.bg or Fotor let you try AI features without installing anything. For example, remove.bg specializes in removing backgrounds with one click, while Fotor and Pixlr offer general photo enhancement and filters.
- Desktop Software: Programs like Adobe Photoshop (with its AI “Neural Filters”) and GIMP (with AI plugins) provide powerful editing. Photoshop is paid, but offers a user-friendly interface. GIMP is free and open-source, though AI features may need extra add-ons.
- Mobile Apps: Smartphone apps often include AI modes. Apps like Snapseed (free) have AI tools for color correction and object removal. There are also dedicated apps like Remini for enhancing old photos.
When choosing a tool, consider ease of use. Many online options are free or have free tiers for basic use. As a beginner, try several to see which interface you like. Over time, you can explore advanced tools for professional work. For more ideas, see our AI Tools & Reviews section, especially the image & design tools page.
Tips for Beginners Using AI Image Editors
- Start with Small Edits: Try simple tasks first, like auto-enhance or simple filters. Then move to more complex edits (like removing objects).
- Backup Originals: Always keep a copy of the original image. That way, if an AI edit doesn’t look right, you can start over without losing your original.
- Read Tool Guides: Most AI tools have help pages or tutorials. Use them to learn specific features. (For example, search for “how to remove background in [Tool Name] AI” if needed.)
- Be Patient with Processing: Some high-quality AI edits take time to process. If an image is large or complex, wait a few more seconds for the result to finish.
- Check Results Carefully: AI isn’t perfect. After editing, zoom in to check details. Sometimes AI may blur something or remove a small part it shouldn’t. If you notice an issue, try adjusting the settings or using a different tool.
- Combine AI with Manual Edits: AI tools make many tasks easy, but you can also open the AI-edited image in a regular photo editor to fine-tune further (like cropping or minor touch-ups).
- Practice with Free Tools: Take advantage of free trials or basic plans. Tools like Canva’s background remover or Google’s AI editing features in Photos can be tried without cost.
- Stay Ethical: Use AI edits responsibly (e.g., don’t create misleading images). Always be transparent if editing photos of people.
Next Steps and Resources
After you’ve practiced, keep learning. Explore articles on related topics like more AI design tools or how AI is changing creative work. The field of AI image editing is growing fast, so stay curious. Try combining multiple AI features: for instance, first upscale an old photo, then colorize it. This can give surprising results.
Remember, this is an introduction meant for beginners. As you become comfortable, you might look into more advanced aspects like training your own simple models or understanding how these algorithms work under the hood (learn about machine learning here). For now, use the steps and tools above to enhance your photos. Using AI can save you time and unlock creative possibilities in image editing, an important skill as technology continues to evolve.
For related topics, explore the AI Explained and AI Tools & Reviews sections for more beginner-friendly articles.
Share
What's Your Reaction?
 Like
0
Like
0
 Dislike
0
Dislike
0
 Love
0
Love
0
 Funny
0
Funny
0
 Angry
0
Angry
0
 Sad
0
Sad
0
 Wow
0
Wow
0


Free tools are great to start with and often have basic features. Paid versions usually offer higher quality results or more options. I recommend trying a free version first to see if it meets your needs, then upgrade if you need more advanced edits.
No coding or special skills are needed. These AI image editors are designed with a simple interface. You just click buttons or use sliders; the AI runs automatically in the background.
No coding or special skills are needed. These AI image editors are designed with a simple interface. You just click buttons or use sliders; the AI runs automatically in the background.
Most AI editors support common formats like JPEG and PNG. If you have a rare format, you can usually convert your file to PNG or JPEG before editing.
Yes, AI upscaling is specifically designed to preserve or even improve image quality by adding realistic details. Modern AI upscalers often produce great results, though the quality can depend on the original photo.
It’s a valid concern. You should always check how a site handles your data. Reputable AI services usually delete your image after editing. If you’re worried about privacy, use software that runs on your computer instead.